
If you’re looking to add something special to your home decor, you can’t go wrong with succulents and cacti.
Whether you plan on using these lovely plants indoors or outdoors, they bring a pop of color wherever they go.
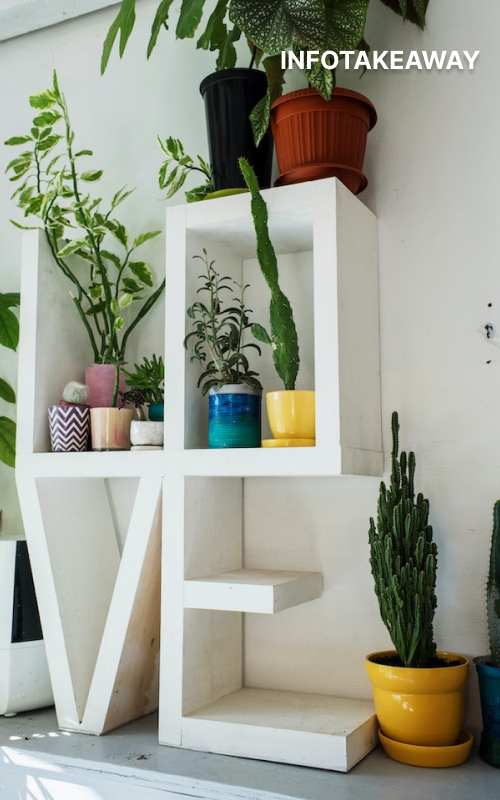
But don’t stop at buying some pots! Take your love of succulents and cacti to the next level by creating your own stunning wall planter from scratch!
Follow this step-by-step DIY project guide to create your own succulent wall planter in no time at all!
Step 1 – Place Pots on Board
Find two of the same size urns or pots that you’d like to use and set them on a sturdy board of your choice.
Position one pot so that its backside is facing forward and position the other pot so that its front side is facing forward.
The pots should be about as close together as possible, with an inch or two of space between them.
Mark where the pots will go on the board and then take them off to add drainage holes if needed. If you’re using containers with removable bottoms, place those bottoms into the urns or pots and push them up against each other for now so that their lids are touching one another as well.
Your board should resemble an upside-down V. Make sure the corners of the bottom edges of both pots are aligned on the board and that they don’t overhang.
Step 2 – Drill Hole
- Hold the base of the wall planter up to the wall and mark where you want your screw hole.
- Use your drill to make a small hole through the drywall and into your stud, it is important that you use your pilot hole for this step.
- Once you have drilled into your stud then make a small hole on the other side of the wall planter as well, do not worry about making this hole too big because it will not be seen after we fill it with some glue.
- Spread some wood glue on one side of both holes, using a Q-tip will help if you want to get any excess glue off once it has been applied. -Insert two screws into each hole.
- Thread the screws all the way down until they meet at the top of the plastic container. Tighten them so that they are snug but not over tight. You will want to leave a gap between the wall and the back of the plants so that there is room for soil later. Place your succulents in their new home!
Step 3 – Wire Hooks Into Holes
- Thread the wire hooks through the top set of holes on the back of your terrarium. This can be hard to do with just one person, so ask someone to help you!
- Bend the wire hooks so that they fit snugly into their respective holes.
- Fit all four corners of the wire hooks into their respective holes, and then use pliers to tighten them up securely. If you can’t reach them with pliers, use needle-nose pliers or vise grips instead!
- Wrap electrical tape around each corner of wire for extra security and protection from snags or rusting over time
- Fill up your planter with soil, succulents, and rocks until it’s about an inch from the top.
- Fill a spray bottle full of water and give everything a good soak.
Step 4 – Attach Hooks to the Wall
Once the frame is standing, use small screws to attach hooks to the wall. The screws should be spaced about 3 inches apart, evenly spread around the frame of the planter.
Make sure they are level with one another and do not stick out too far away from the planter, otherwise you will risk breaking your succulents when hanging them.
The front hook should be placed one or two inches below eye level; this will make it easy for plants to dangle and dry out in between watering periods.
You can also place the back hook just slightly above eye level if you want to grow trailing plants like cacti. Just remember that shorter trailing plants need more water than taller ones!
Step 5 – Add Plugs
Now it’s time to plan out where the plugs will go. You want them spaced about 6-inches apart. But how do you measure that?
Well, each hole should be 5/8 wide and 1 deep. Put your pencil at the base of one plug and draw a line down until it meets with another spot on the same level as the plug.
That is one inch. Then move up an inch on your pencil and mark again – this is where you put your next plug. Continue until all six plugs are marked!
Step 6 – Fill With Soil
This is the fun part! Fill the container with soil so that it reaches within an inch of the top. It’s not too heavy so you can probably fill it all by yourself.
Spread out the soil evenly, pat down to make sure it’s nice and snug, and then go ahead and plant your succulents right on top.
If you’re making more than one planter, plant one succulent per row. There is no wrong way to do this, as long as everything is planted well!
You could use one type of succulent or different varieties from around the world. You could even mix up the colors for some extra visual interest. Be creative and have fun with it!
Step 7 – Planting Succulents
The last step is to plant your succulents. I recommend planting the roots inside the wall planter because they’ll grow nicely and they won’t spill out of the planter like they would if you planted them outside of it.
Plant them at least 3 inches deep, more if possible so that there’s a deep reservoir for water. Place each one about 2 inches apart and be sure not to overcrowd them; this will ensure that all succulents will have plenty of room to grow.
Fill up any empty spaces with small stones or pebbles and make sure to add some soil over the roots of your plants. Now you’re ready to enjoy your beautiful new wall planter!
How do you keep succulent walls alive?
Succulents are surprisingly hardy and can survive on their own with the right attention. Keep them alive by never putting them on a cold or hot surface, which could lead to condensation, algae growth, fungus, or rot.
Don’t overwater them. Water once per week by soaking the soil until it’s evenly moist and letting it dry out slightly between waterings.
The right amount of light is also important so place your succulents within three feet of an east-facing window where they will receive sunlight all day long (a south-facing window works too if they get direct sunlight).
Do succulents like direct sunlight?
Succulents need bright light but not direct sunlight. Direct sunlight will scorch the leaves of succulents and they will be unable to thrive, grow, or produce their beautiful flowers.
There are two options for providing indirect sunlight indoors. One option is to use natural light; the other option is to use artificial light.
The artificial light can come from different sources including lamps, desk lamps, halogen lamps, low-energy fluorescent bulbs, or LED lights.
How often do you water a succulent wall?
The frequency you need to water your succulent will depend on the size of the wall planter and the humidity levels where it is located.
Generally, if you have a succulent planter that’s less than 10 inches tall, they will only need to be watered once every 5-7 days.
Taller succulents (over 10 inches) will require watering 2-3 times per week, depending on their level of exposure to natural light.
What does an overwatered succulent look like?
When succulents are overwatered, they will develop roots as their stems shrink and rot. This often leaves the plant drooping over with hardly any color left to it at all.
Sometimes it is still holding onto its dried-up old leaves, which are usually covered in dust or bits of sand that have collected on top of them.
To avoid this issue make sure you let the soil dry out fully before adding more water.
Some signs to watch for include root growth coming from the base of the stem, brownish or greenish coloring due to bacterial growth, an off smell when touched near the roots, and chunks missing from the top of its stem where it broke away completely after becoming too dry.
How do you tell if a succulent is Underwatered?
If your succulent is not getting enough water it may have leaves that droop down and might be duller in color.
Look for cracks at the base of the stem too; these are another indicator that your succulent may need more water.
The bottom of the plant should also feel moist, but not wet and slimy. You can tell if your succulence is overwatered by checking to see if there are any brown leaves or signs of rot.
Conclusion
Now you can start to lay the succulents into the planter. Start with three and continue planting as your design dictates, or do an all-over for an even more dramatic statement.
And then display them! Hang them on the wall or place them on a shelf and you have one stunning DIY succulent wall planter that you created yourself and looks like something you might see at a high-end boutique store!
Also, check out “brick wall decor“, “balloon decoration on wall“, “how to hang curtains“, and check out infotakeaway for more similar content.